 This stand is designed to hold SCA youth combat “boffer” swords and similar foam-padded weapons.
Objectives
I looked at a number of racks for steel and rattan weapons and then came up with a custom design that combined several elements with the following criteria.
- Support an assortment of SCA-approved youth swords and pole arms, which are typically between 2″ and 3” in diameter, and anywhere from 15″ to 72″ in length.
- Pack down compactly to an easy-to-carry unit that can be loaded into the van along with other youth combat gear, carried to the site, and then set up quickly.
- Simple to build using stock dimensional lumber and basic hand-held power tools.
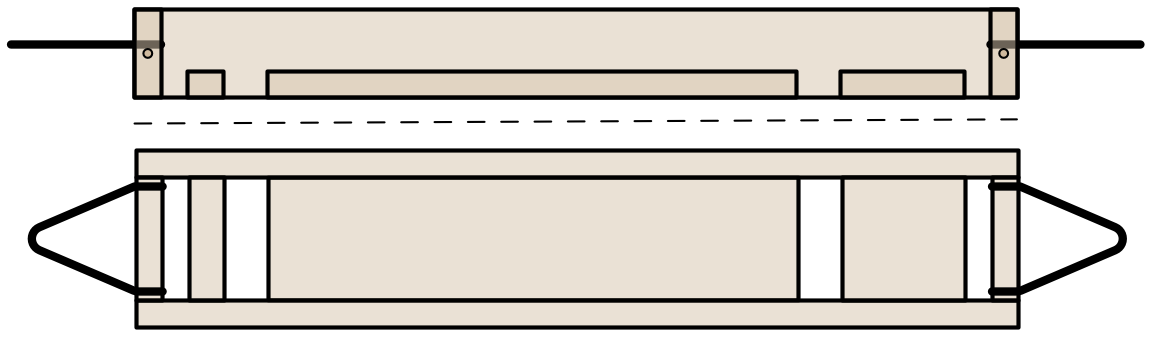
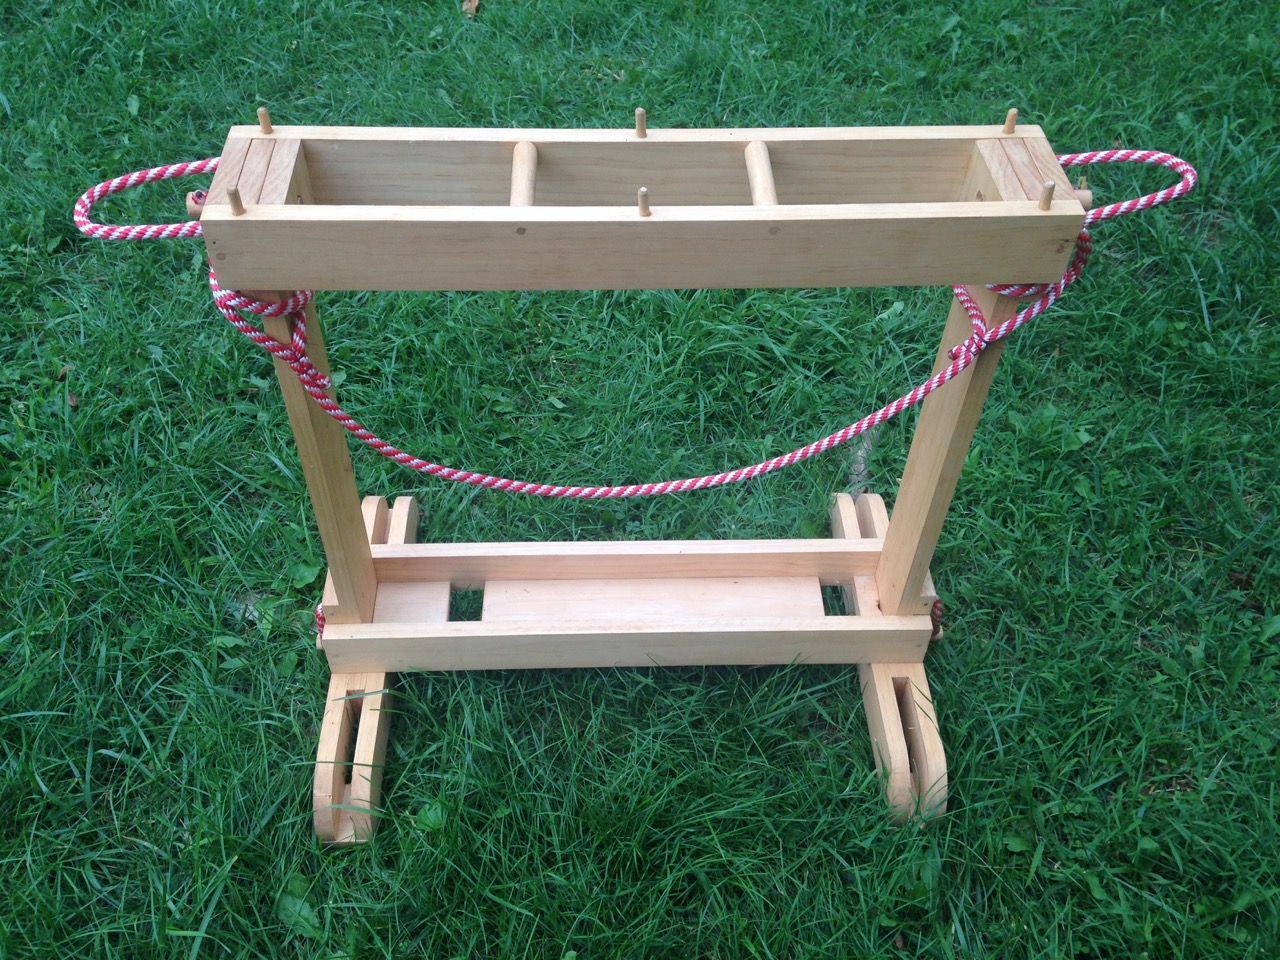
Overview
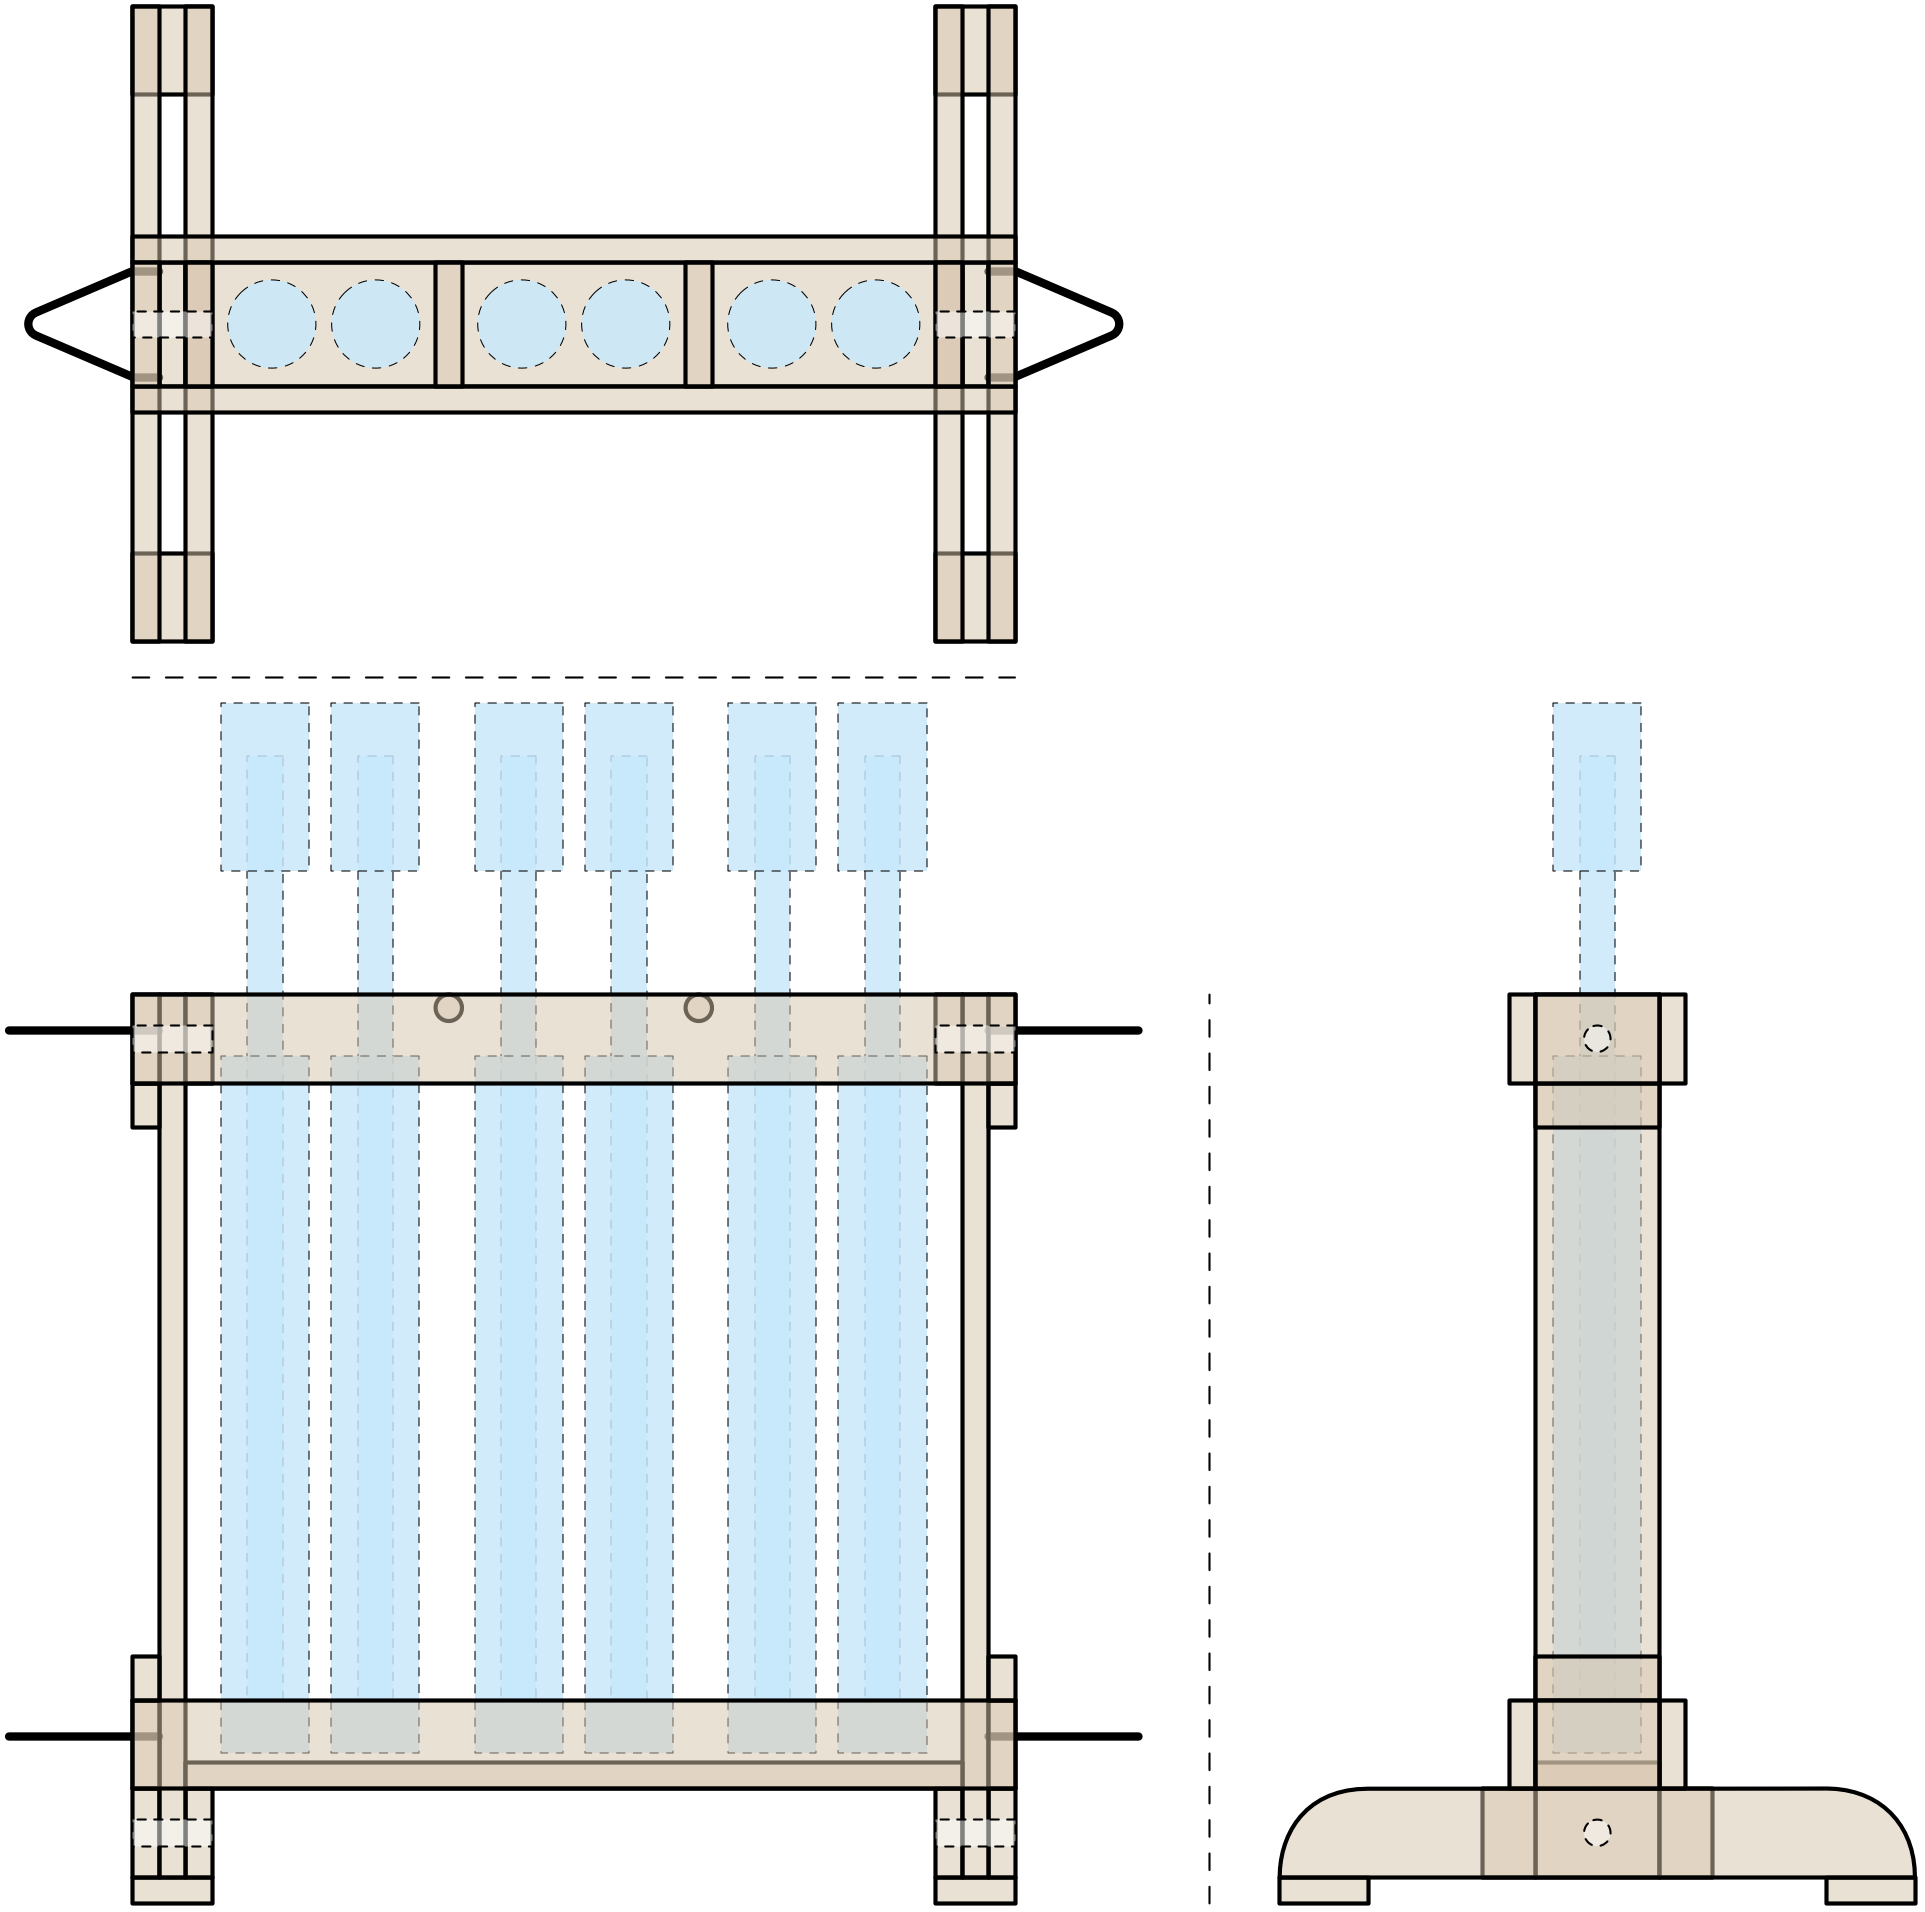
Shown here set up and ready for use, with weapons shown in blue.
Materials
- Common 1×4: 1 piece 8′ long (cutting plan: 2 @ 25” legs, 1 @ 15” bottom, 1 @ 1” bottom, 1 @ 3.5” bottom, 6 @ 2.5” top and bottom ends, 4 @ ~1.25” leg supports)
- Common 1×3: 2 pieces 8′ long (cutting plan: 4 @ 18” feet rails, 4 @ 25” top and bottom rails, 4 @ 2.25” feet bottoms, 4 @ ~1.25” feet spacers)
- 3/4″ dowel: 1 piece 24″ long (cutting plan: 2 @ 3.5”, plus 4 @ 3” for removable pegs)
- 1/4” dowel: 1 piece 48″ long (cutting plan: 8 @ 1″ pegs to strengthen corner joints, 8 @ 1.5″ pegs to strengthen legs, 8 @ 2.25″ pegs to strengthen feet, plus 6 @ 1.5″ pegs in top to hang items on)
- 1/4″ rope: about 15′ of 3/8″ braided poly “derby” rope (used for two handles on each shelf, plus four retaining links for pegs used to pin legs to top shelf and feet, with the remainder used to wrap around the packaged unit for transport)
- 16 thin nails about 1.25″ long, to be driven through sides to pin rope handles.
- Wood stain and protective finish.
Steps
Start by building the six pieces of the rack, then finish them and attach the ropes.
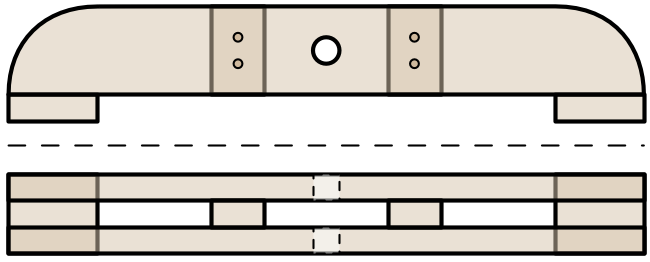
Feet
Make two identical sets, each:
- 2 bars 1×3 @ 18” long with two corners rounded off
- 2 spacers 1×3 @ 1.25” long
- 2 bottoms 1×3 @ 2.25” long

Sandwich spacers between the bars, exactly 3.5” apart (use a piece of 1×4 to assure spacing and squareness), attach them with glue, and clamp until dry.
The glue is probably strong enough, but optionally reinforce with small nails, or with pegs by drilling a pair of 1/4″ holes through the sandwich of feet and spacer on each side and gluing in a piece of dowel.
Place bottoms at outer edge of feet and attach with glue.
Drill a 3/4” hole exactly centered in each bar.
Legs
Make two identical sets, each:
- 1 bar 1×4 @ 25” long
- 2 supports 1×4 @ 1.25” long

Place the supports 2.5” from one end and 5” from the other and attach with glue.
The glue is probably strong enough, but optionally reinforce with small nails, or with pegs by drilling a pair of 1/4″ holes through the legs and support on each side and gluing in a piece of dowel.
Drill a 3/4” hole exactly centered in each end, by feeding it through the open space in an assembled foot unit and using the holes there as a guide.

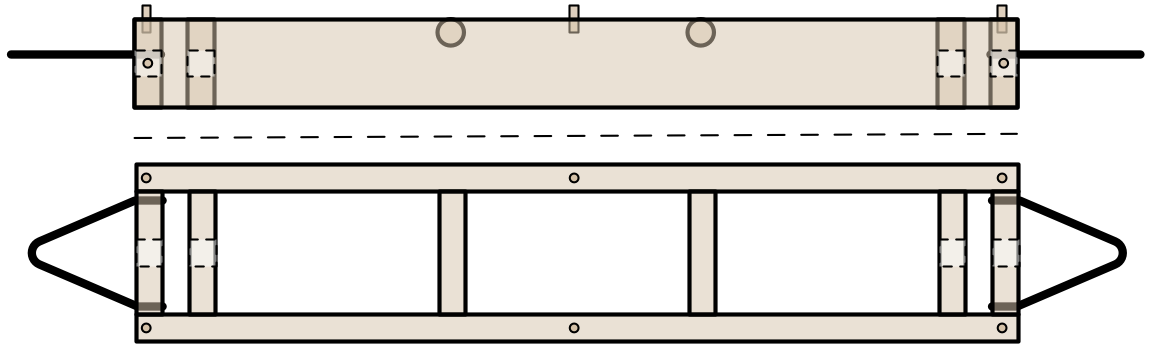
Top
Make one set, with:
- 2 rails 1×3 @ 25”
- 4 end spacers 1×4 @ 2.5”
- 2 dowels 3/4” @ 3.5”

Sandwich two of the end spacers between the longer rails and attach with glue.
The glue is probably strong enough, but optionally reinforce with small nails, or with pegs by drilling a 1/4″ hole through each end of the rails into the side of the spacer and gluing in a piece of dowel.
Fit the other two end spacers 3/4” away from the outer pieces (use a spare piece of 1×3 or 1×4 to assure spacing) and attach with glue.
Fit the two pieces of dowel between the rails to evenly divide the center into three regions and glue them in place. Reinforce with small nails or pegs. (Alternately you could use five pieces of dowel and separate it into six equal spaces.)
Drill three 1/4″ holes in the top of each rail, apply some glue, and tap lengths of dowel into place to serve as hanging hooks.
Drill a 3/4” hole exactly centered in each end, passing through both end pieces.
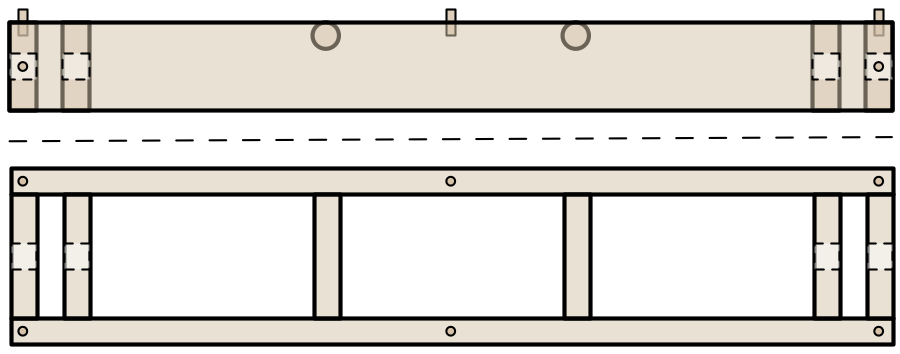
Bottom
Make one set, with:
- 2 rails 1×3 @ 25”
- 2 end spacers 1×4 @ 2.5”
- 3 bottom pieces 1×4” @ 1”, 3.5”, and 15”

Sandwich the end spacers between the longer rails and attach with glue.
The glue is probably strong enough, but optionally reinforce with small nails, or with pegs by drilling a 1/4″ hole through each end of the rails into the side of the spacer and gluing in a piece of dowel.
Fit the 1” bottom piece 3/4” away from one end (use a spare piece of 1×3 or 1×4 to assure spacing) and attach with glue.
Do the same thing with the 3.5” piece on the other side.
Lastly place the longer bottom piece evenly between the other two. There should be 1.25″ gaps created between the pieces, which should line up with the support brackets on the side of the leg pieces, but you may need to sand or file the bottom pieces slightly to ensure they fit.

Finishing
Cut four removable pegs from the 3/4″ dowel, each 3″ long.
Sand all of the external surfaces and apply a stain, oil, or other protective finish.
Drill a pair of 3/8″ holes on each side of the top piece. Cut two pieces of rope each 12″ long, apply glue to the ends and feed into the holes, then tap small nails through the sides to hold them in place.
Repeat this process for the bottom piece.
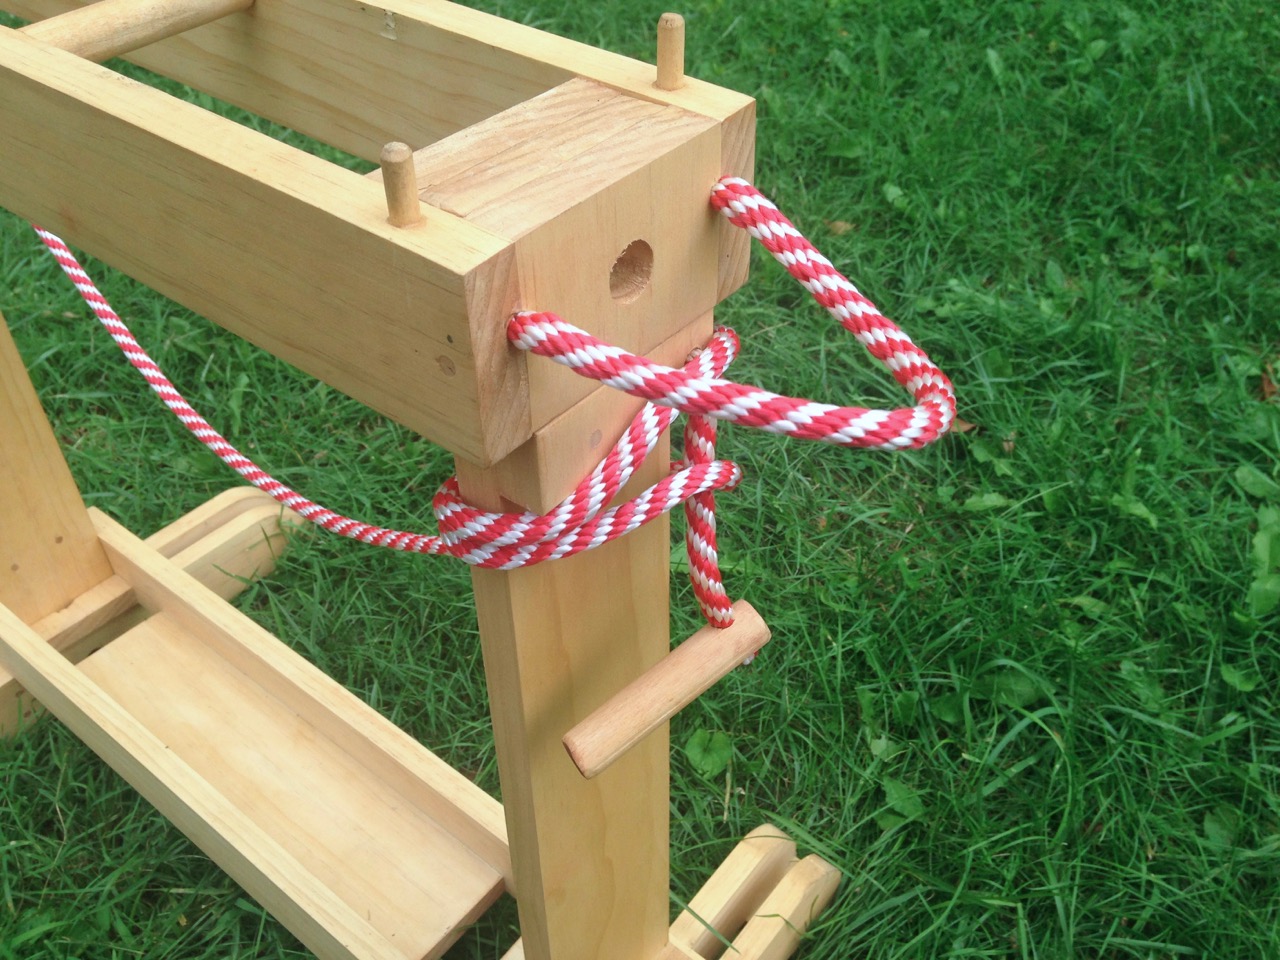
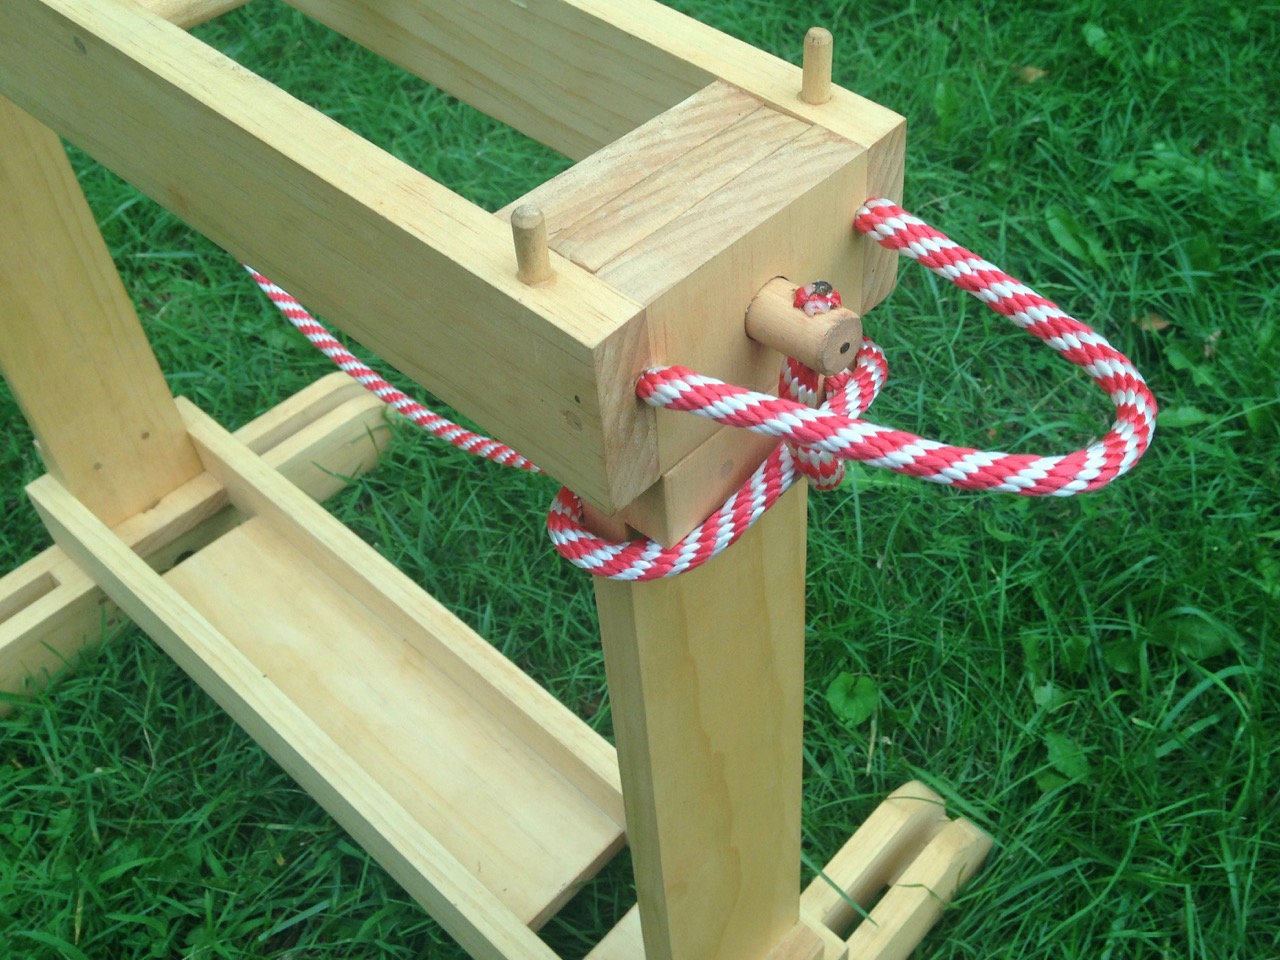
Drill a 3/8″ hole in the each of the supports on each leg, and drill a similar hole through one end of the removable pegs. Cut four pieces of rope, two about 6″ long and two about 12″, apply glue to the ends and feed into the holes, then tap small nails through the sides to hold them in place. (Make sure that the ropes are just long enough that the pegs can be easily inserted through the holes on the end of the legs.)
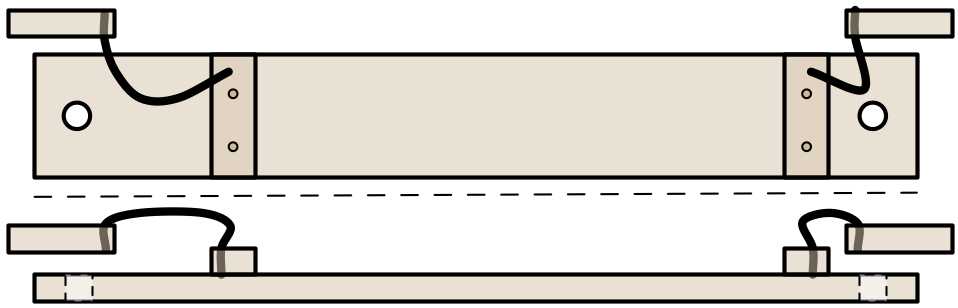
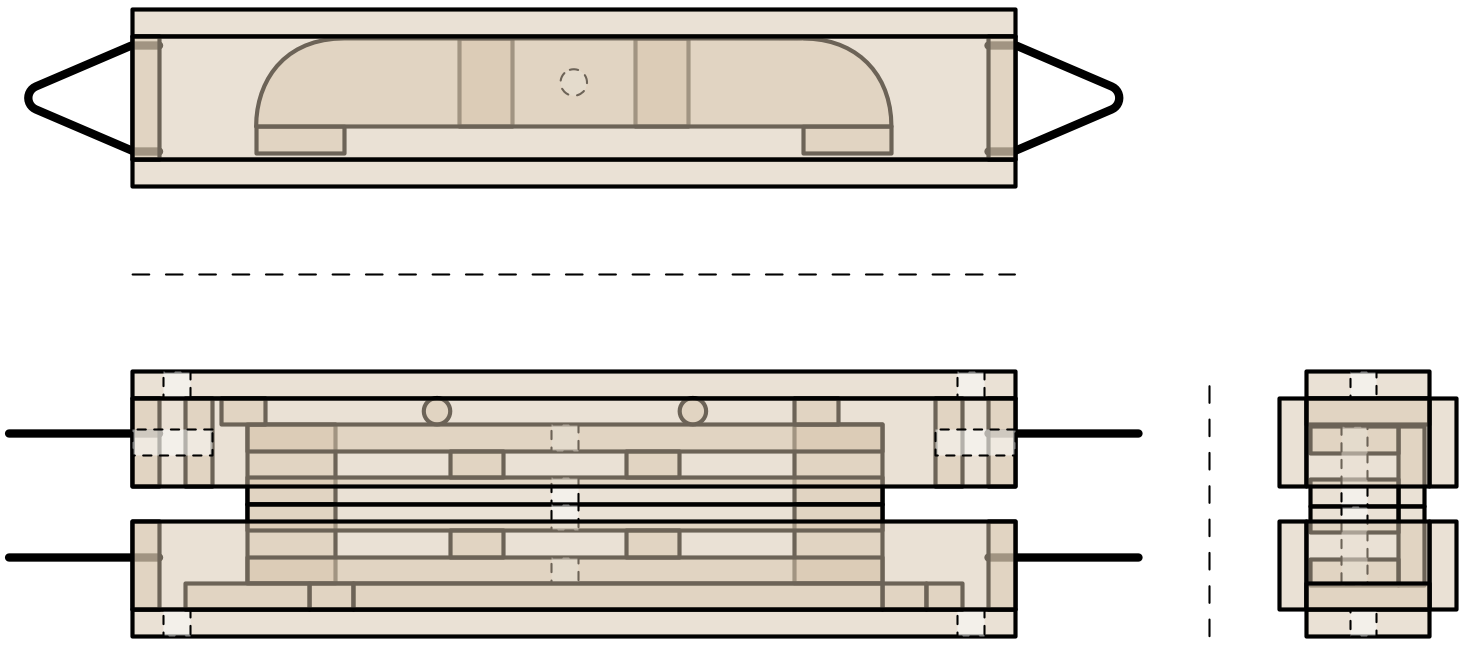
Stacking for Transport
The pieces can be stacked together to form a single package.

The resulting bundle is 25″x5″x7″. You can use a piece of rope to fasten it together and create a carrying strap.
Field Setup
Here’s Alex at Pennsic bringing out the packaged unit at our camp site.
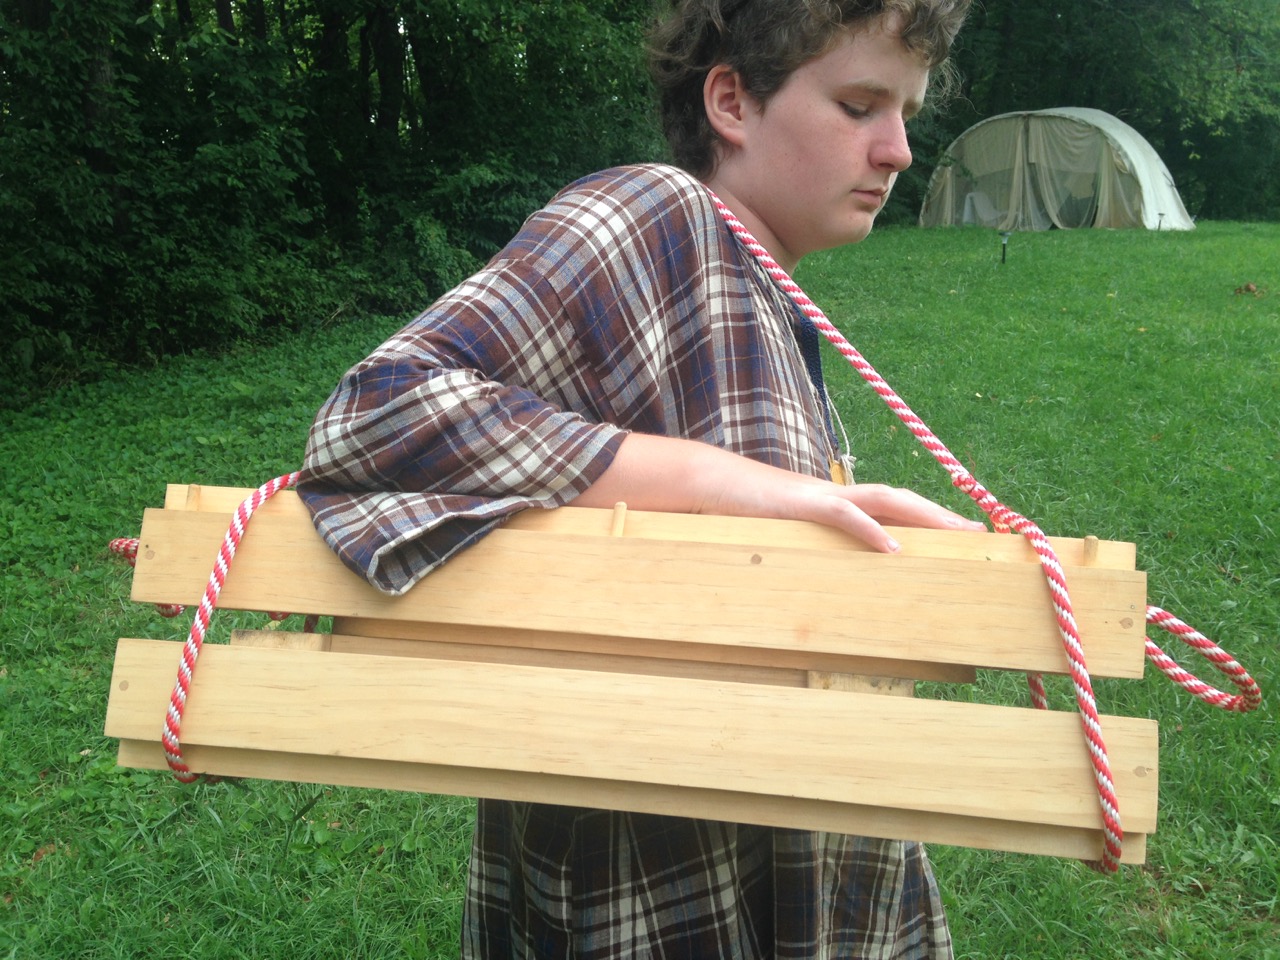
You can see how the carrying strap also keeps the package tied together.

Slip the rope loops off each end of the bundle and separate the top and bottom:

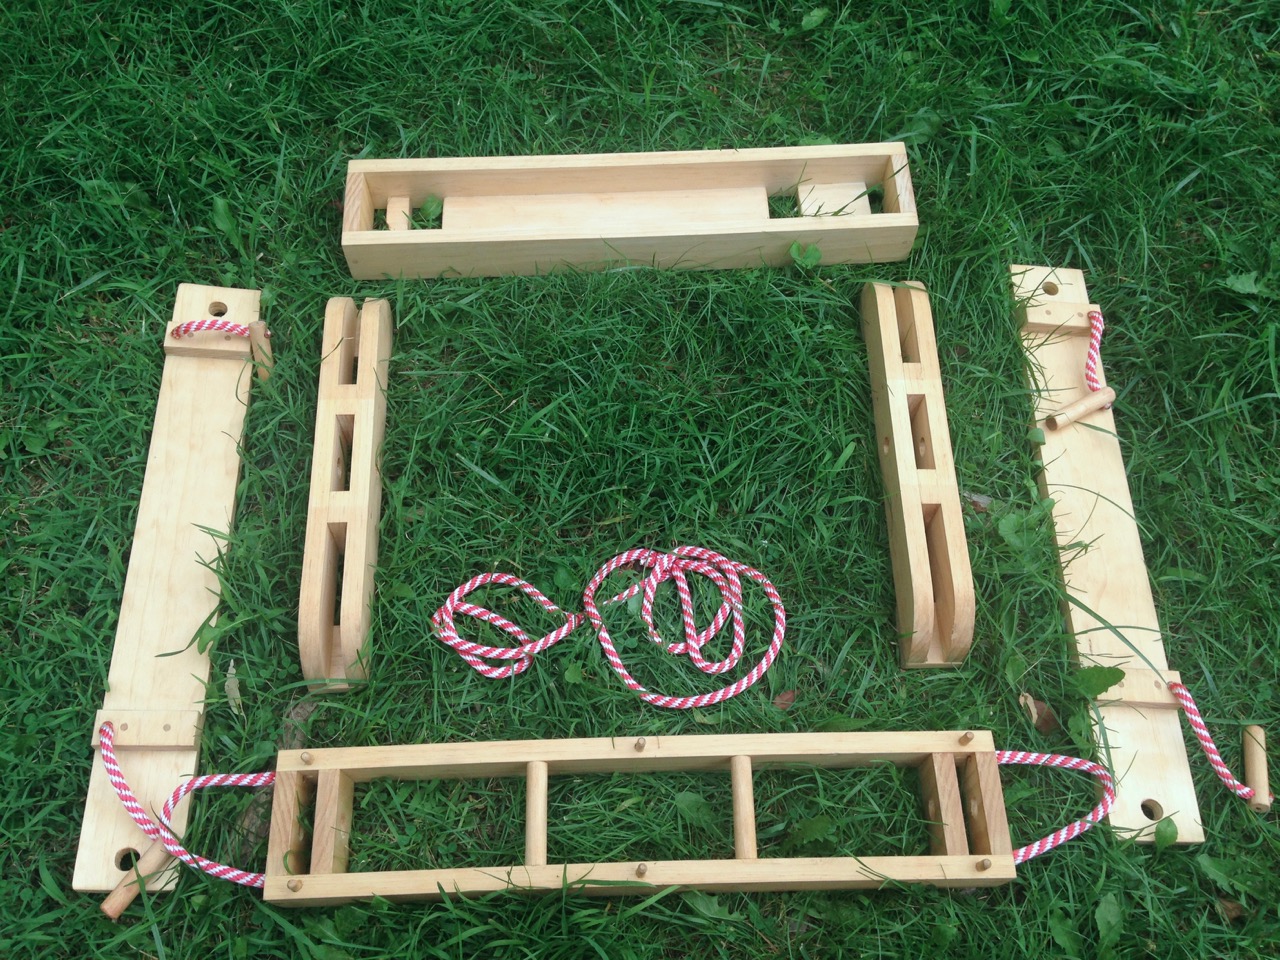
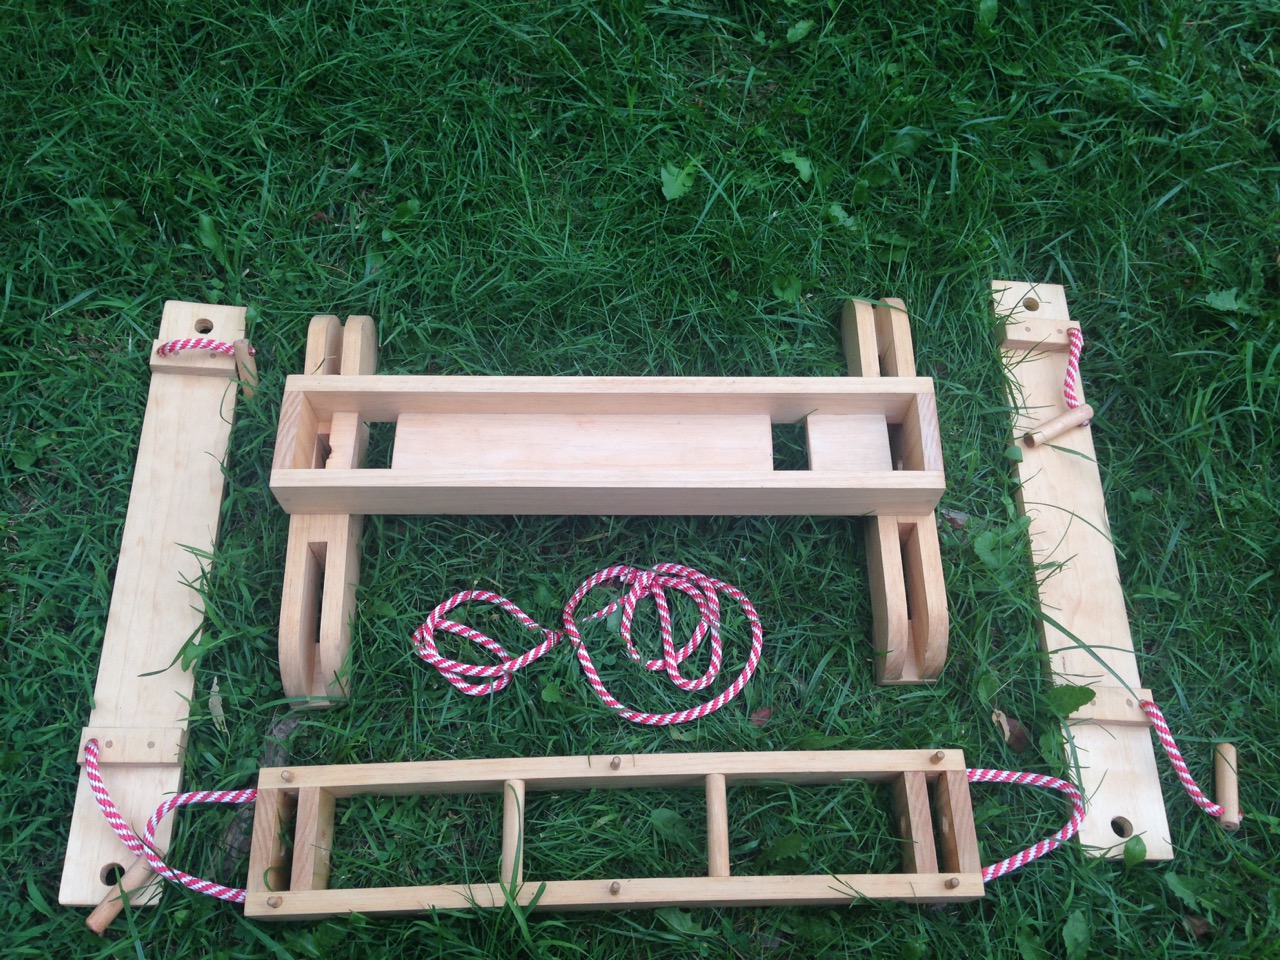
Unpack all of the pieces and spread them out on the ground:
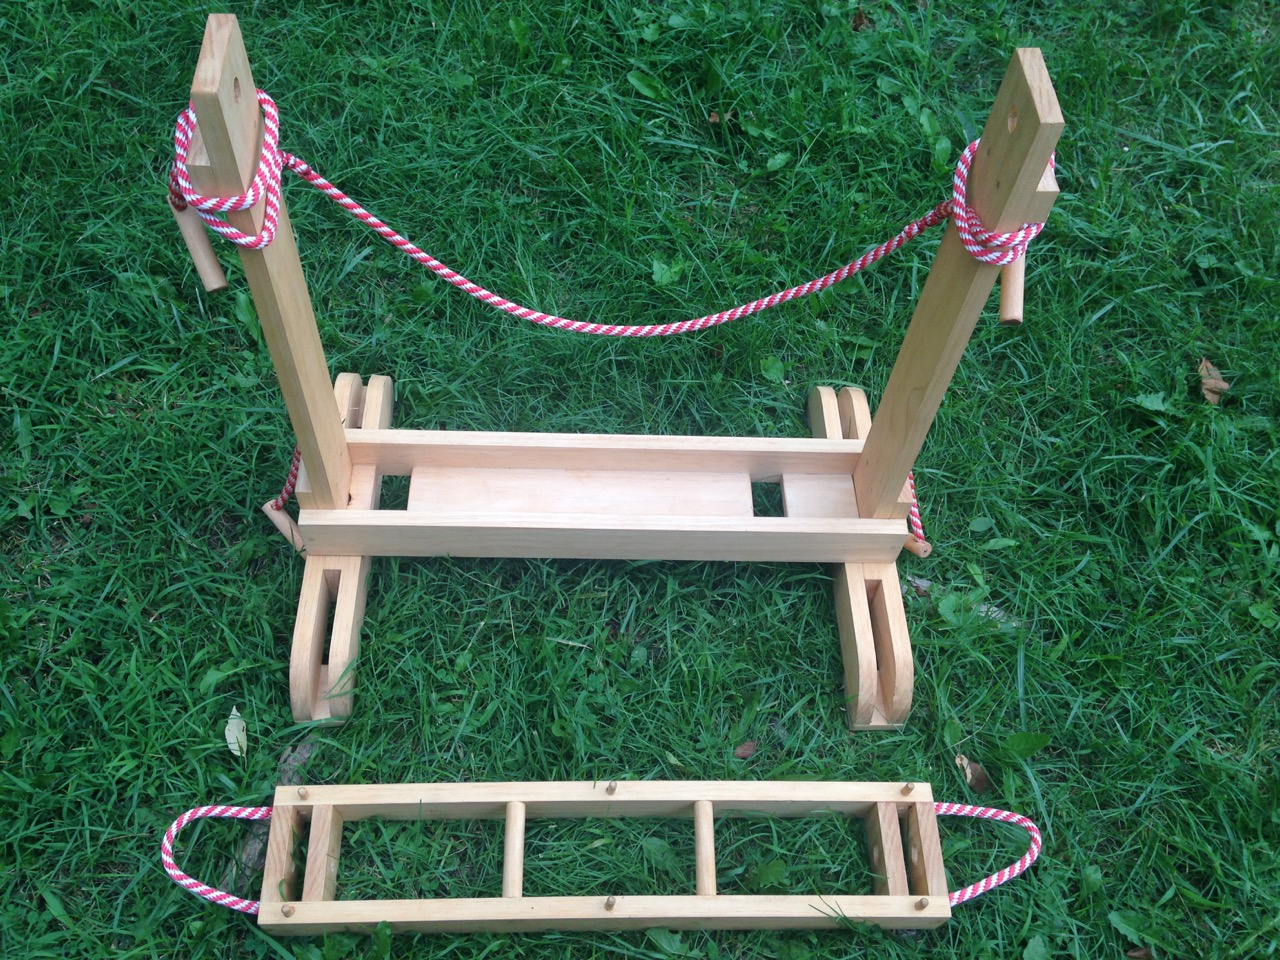
Set the feet upright and place the bottom shelf on them with their holes aligned.
Slide a leg down through the bottom shelf into the foot on each side, with the supports on the outside.

I usually drape the carrying rope around the legs at this point to ensure it doesn’t get lost.
Slide the top onto the legs.
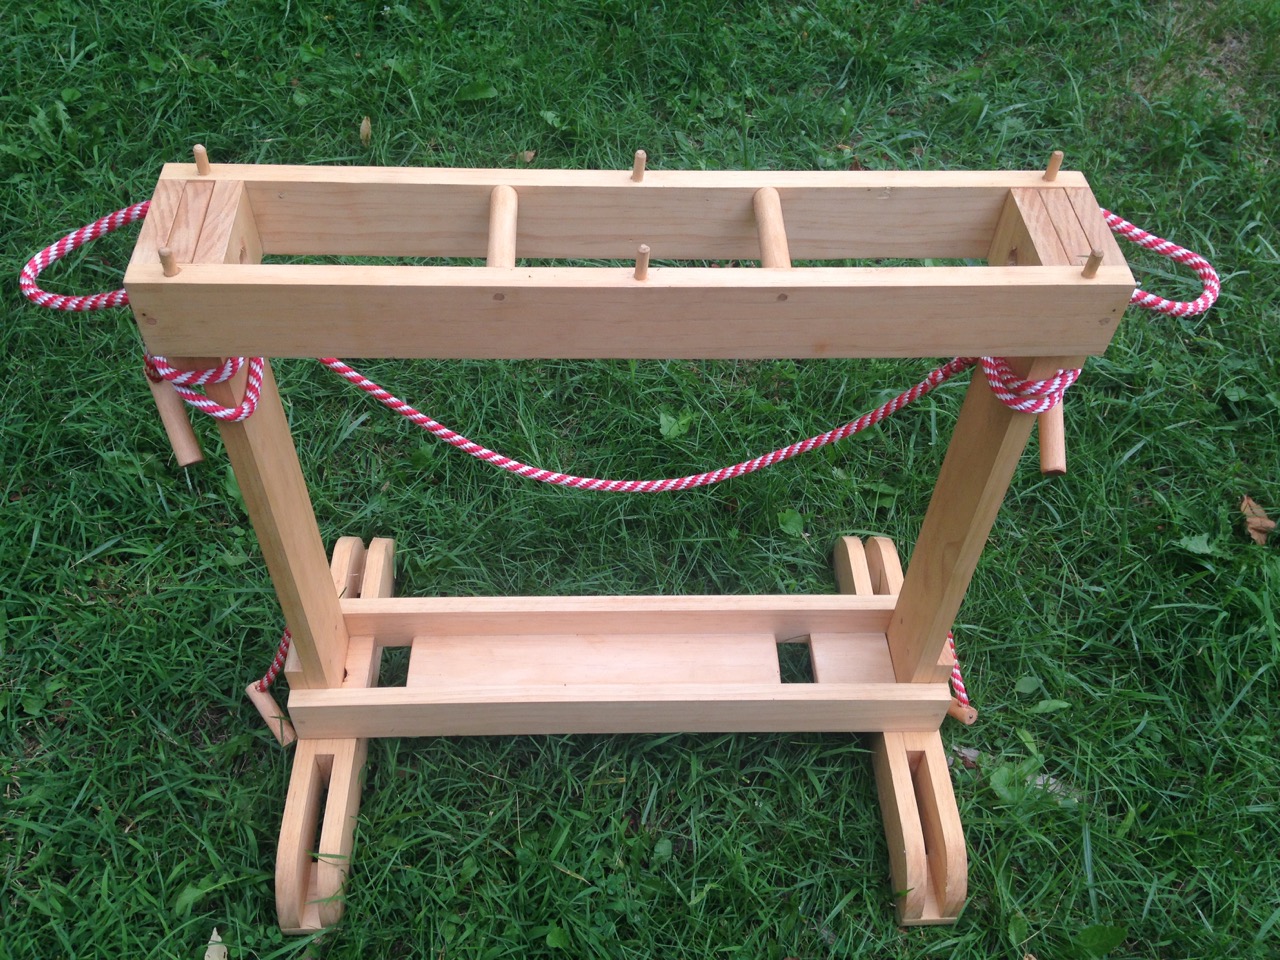
Find the lower peg on each side and slide it through the holes on the foot and leg to lock them in place.


Repeat this process with the pegs on the top.
The stand is now complete.
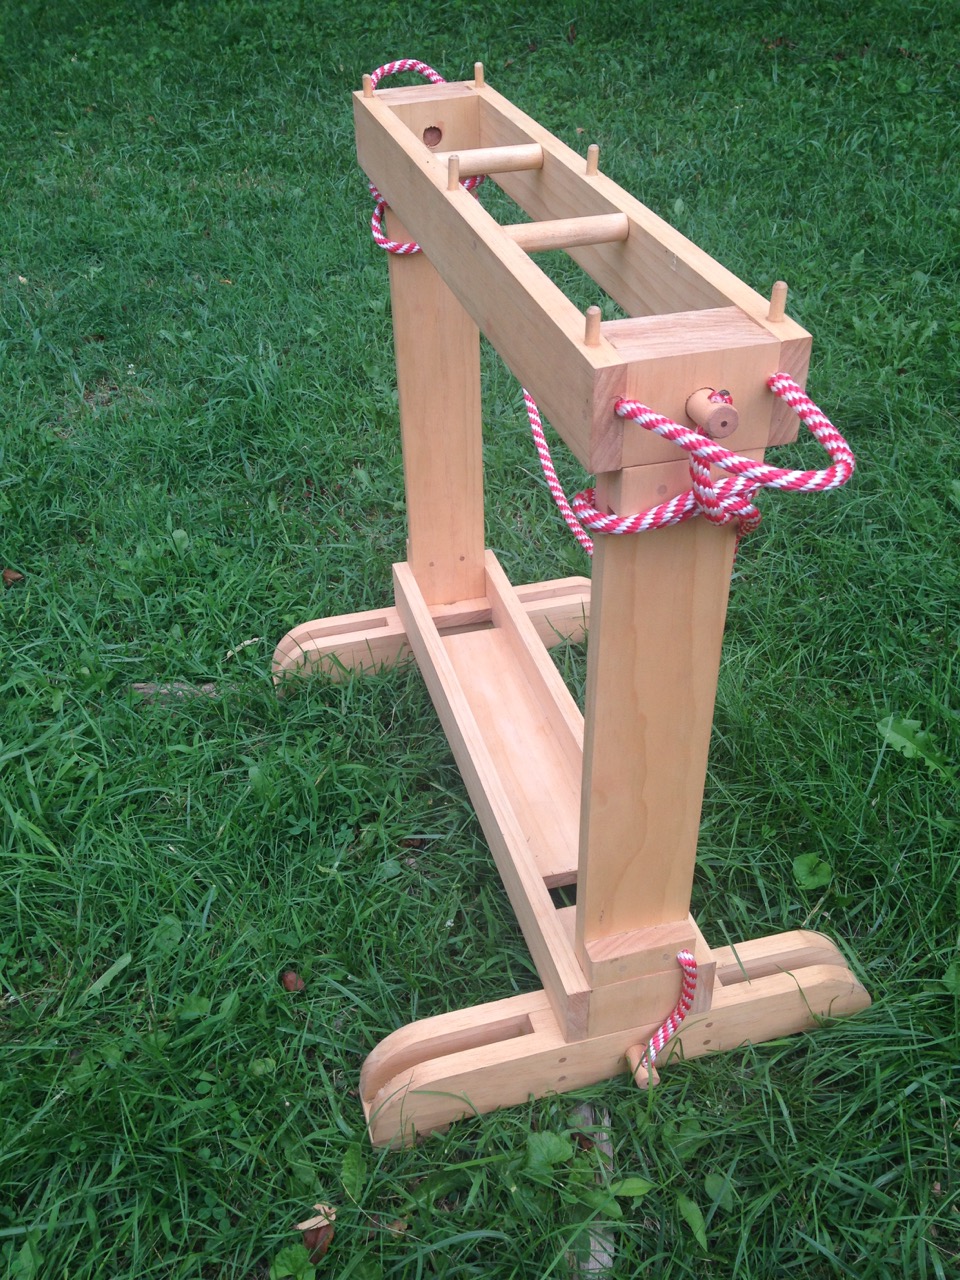
Load it up with weapons.
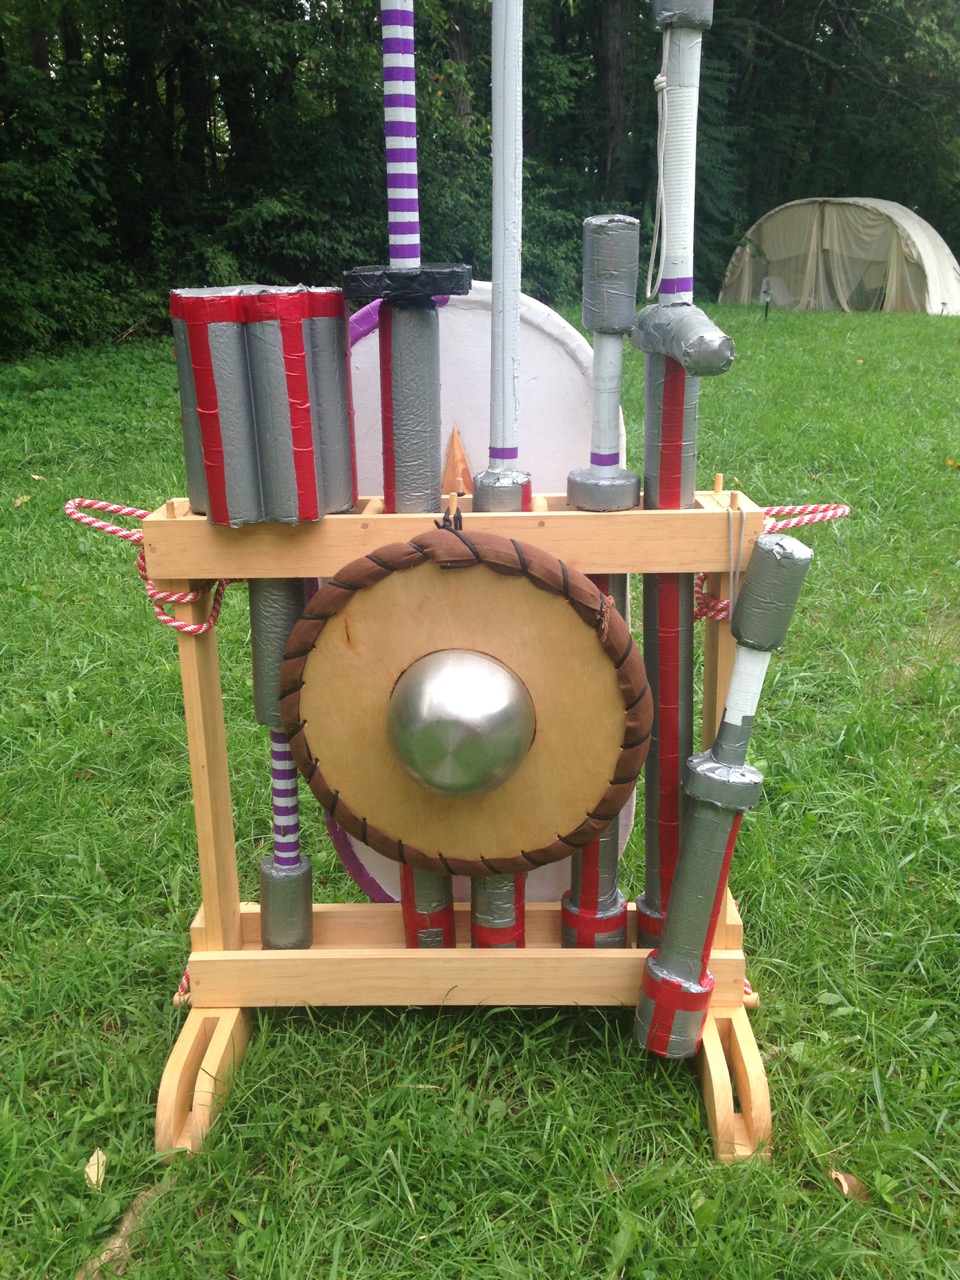
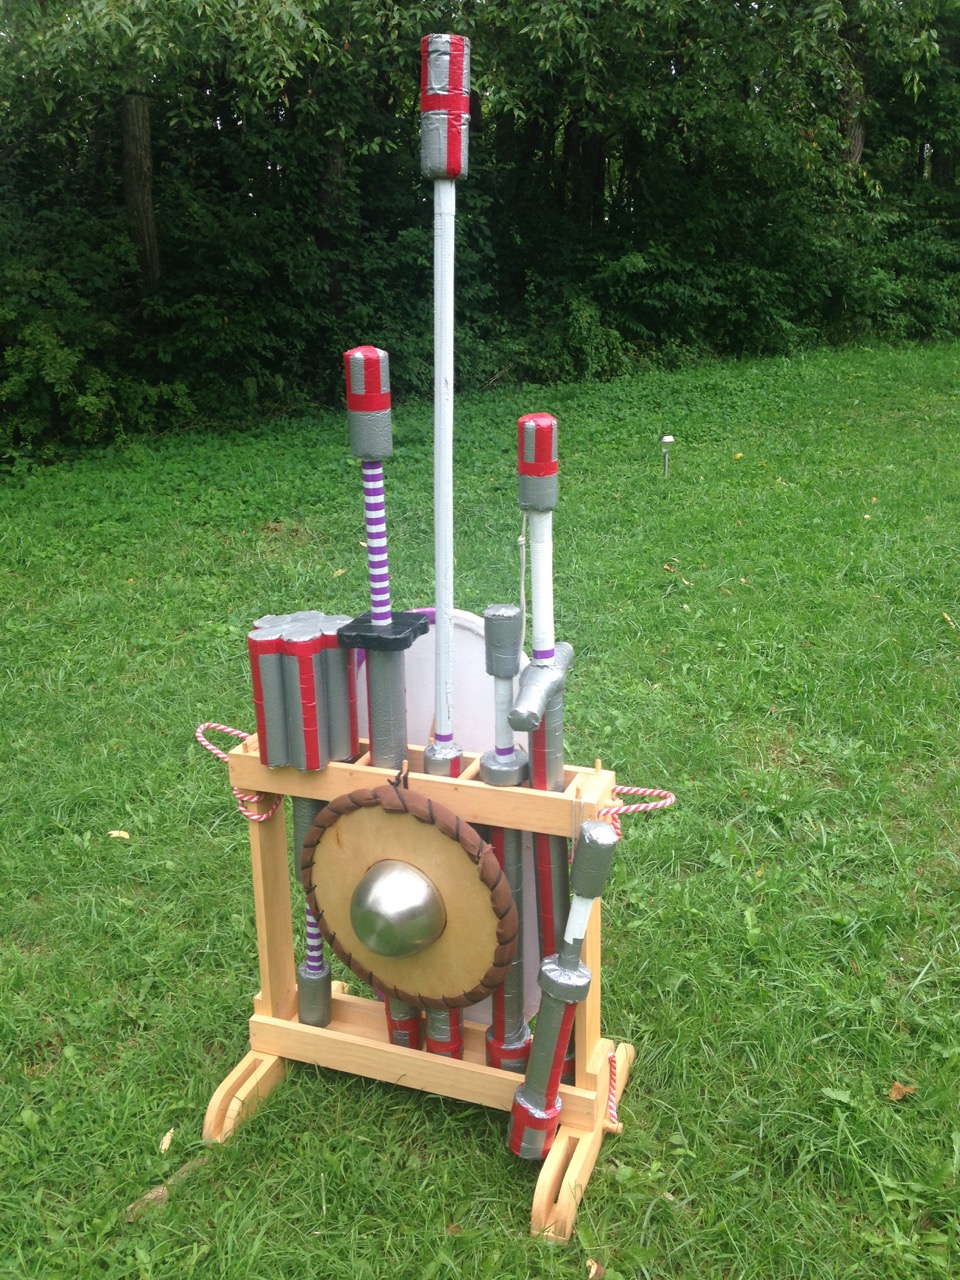
You can hang shields and smaller weapons on the pegs on the top.


Evaluation
The stand required a bunch of work to build, but looks great.
It’s large enough to hold all of a fighter’s active weapons and shields plus a few extras, but when we bring loaner gear to an event it quickly gets overwhelmed. It’s still much better than nothing, as the extra weapons can be leaned up against the outside.
When it’s packaged together, there’s a gap of an inch between the top and bottom sections, and I wish it fit more snugly. Bulding the bottom section out of 1×4 rails rather than 1×3 would have eliminated that gap.